News:

Welcome to the Tormek Community. If you previously registered for the discussion board but had not made any posts, your membership may have been purged. Secure your membership in this community by joining in the conversations.
www.tormek.com

Main Menu
Menu

Show posts

This section allows you to view all posts made by this member. Note that you can only see posts made in areas you currently have access to.

Show posts Menu

Messages - kennyk

#1
General Tormek Questions / Re: 1/4" Bevel Edge Chisels
November 09, 2014, 12:44:47 AM
I've been told that Tormek have examined my original machine and can apparently find no fault with it.

Yet as soon as I moved from that machine to a new machine, I was able to sharpen blades squarely.

I'm now in the position where I've no idea what was going on.  I simply won't accept any attempt to shift the blame to the blades, as they included in the blades that were skewed, a blade from a Clifton No 7 Jointer Plane, the cost of which is more than the cost of a T4.

I appreciate all the hard work by Stig and the UK distributor on this but the fact remains that no-one can explain why I had problems with the original machine.  Further, I was never completely satisfied with the straightness of the edge of any blade I sharpened with either T7 unit.  I could never find a way to prevent a curve.

It is with sadness therefore that I have to grudgingly admit defeat with the Tormek system and reluctlantly accept that it simply does not work for me, at least not to the tolerances I'm looking for.

I'm disappointed because the blades were sharp. but not square or straight.   
Having moved to a school without the Tormek I've had to revert to Oil or Diamond stones. Regrinding on the viceroy Sharpedge and then honing on the oilstone.   It takes a bit longer and the blades whilst still cutting hair, aren't quite as sharp, so I've no access to the Tormek system any more.  I may have been able to perfect the method, but to be perfectly honest, I did over 200 blades on it and that ought to have been enough.  If it's really that difficult then Torkmek need to look again at their training/teaching methods.  I've done nearly as many blades (around 160) by hand in less time than I spent troubleshooting the problems I had with the original T7 unit.

I understand that this won't be well received, and also may appear churlish in light of all the effort from Tormek, but I've reached the end of the road.   I'd hoped eventually to purchase a Tormek for my own workshop, but after the difficulties I've had, my options are now to stick with Scary Sharp or Japanese waterstones.  I miss the ease and speed of the T7 but it's not much good if it's not straight.  :(
#2
General Tormek Questions / Re: i have a dirty stone
September 27, 2014, 12:41:48 PM
My own experience is that yes, the stone does become discoloured.  certainly the side of the stone goes a kind of greeny/browny/grey colour.

Interestingly, I was also doing a pile of rusty chisels a while back - they'd suffered water damage at some point, so there was some bright orange discolouration as well as the deep brown.  This was before I'd seen the electrolysis trick that was posted recently.  After doing a few chisels one day, when I returned to the machine the following day there were brown spots on the surface of the wheel, some could be moved by rubbing with a finger.   The most effective way to get that grey 'new' look back was to use the truing tool.  However the dirty surface didn't seem to affect the operation so I left it until I needed to refresh the surface.  the stone grader isn't as effective as getting rid of the dirty surface appearance in my experience.  But then with a large number of chisels to keep sharp, you tend to worry less about a showroom-condition wheel and more about an effective cutting surface, so I've quickly learned how to tell if the stone is too glazed to cut and requires regrading or truing.
#3
General Tormek Questions / Re: 1/4" Bevel Edge Chisels
September 12, 2014, 12:31:35 PM
Just a further update.   My original machine has gone back to the UK distributor, and I'm told will be making its way back to Tormek HQ fairly soon.

Ultimately I'm hoping to find out the answer to if the machine does indeed have an alignment issue.

Meanwhile, the replacement machine is performing a lot better.    I spoke at length today with Stig and Martin (at UK Distributor Brimarc) in a conference call to discuss some of my concerns with the system as a result of the issues that I've had - in particular we discussed the play on the TT-50, and Stig wil be following up with that to set my mind at rest.   

I still have the odd problem with narrow chisels, which I think are a combination of a severe trapezeoid shape and the registration edge channel of the SE-76 as I'm finding that these narrow chisels do have a tendency to twist in the SE-76,  The upshot, as far as I'm concerned is that I find it easier to use the SVS-32 for narrow chisels and work at the front of the machine, although I'm still finding the trick of keeping the top of the bevel level on the USB a little difficult to master.     I'm sending one of our 1/4" chisels to Brimarc for them to have a play with as well, as we're all keen to come up with the answers. 

Personally I'm preferring working on the front of the machine, grinding horizontally but it does bring its own setbacks in that it requires manual setting of the chisel in the SE-76, but that's possibly down to having spent so much time using it in that mode.

Anyway, we're moving forward with things and  I'm a lot happier with the replacement machine performance.  I expect that the areas of doubt I still have are partly down to the idiosyncracies of the way that the Tormek system operates versus my previous methods of sharpening (Japanese Waterstones and 'Scary Sharp' with 3M lapping film)
#4
General Tormek Questions / Re: 1/4" Bevel Edge Chisels
September 03, 2014, 02:48:01 PM
Just another quickish update.

I received a second machine towards the end of last week.  Immediately I was able to sharpen a blade square using the SE-76 as directed by the videos, so it would appear that there is something misaligned on my original machine.  I hope to get the original sent back tomorrow for inspection.

Further comments regarding 'square'.  On this new machine it is still possible to introduce a skew by applying pressure to one side, whereas it was impossble to correct a skew by applying pressure on the other machine.
Also I have learned to ensure that the reference edge is always the one in the registration edge of the SE-76 as the sides of a blade are not always 100% parallel!

Additionally, I'm struggling a bit with getting a completely straight edge; I'm still getting a very slight convex curve, which I'm putting down to technique, although I'm not sure how to correct it at the moment. 

Regarding narrow chisels of 1/4" or less, it still seems that the SE-76 is not very successful. I suspect that when it was designed it wasn't designed with these in mind.    My solutions are to use the SVS-32 (particularly for 3mm / 1/8" chisels) or to try to manually fit the chisel in the middle of the jig and check with an engineers' square.   It's that channel down the registration edge that is causing the chisel to twist in the jig, and I firmly believe that this issue needs to be addressed by Tormek in terms of modification, or at the very least recommending the SE-76 not be used for narrow chisels.   It can be done but to be brutally honest I spend twice as long re-grinding the 1/4 chisels to correct the skew from it twisting in the jig the first time as I do sharpening and honing a chisel if I get it bang on the first time.
#5
I'm hoping to have received another machine for testing by the end of the week. with any luck I should have some results fairly soon.
#6
I'm waiting for delivery of a known good machine. I'm hoping it will arrive later this week.
As soon as I have any updates I will pass on the information. 

I'm still suspecting an issue with the placement of one of the sleeves as the most likely culprit, given that I can get a straight bevel in reverse configuration.
Any time I've had a squint bevel with my reverse config in the last 100 blades, when I've re-checked the blade against the '76 with a square, that has caused the skew, even if it's out by a fraction, so it leaves two possibilities:

1. BOTH SE-76 have the same fault with the registration edge being out of square. (which I'm not using as a reference because the jig is upside down)
or
2.  one of the sleeves is not on the same plane as the other, and out of alignment with respect to the wheel shaft.   (and I'm not using the sleeves when the USB is on the front )

I am reminded of a curious factoid about the Martin Guitar Company which is of potential relevance here.  Back in the 70s it was discovered that the jig that the staff were using to measure for the precise location of the guitar bridge had worn to such an extent that the bridge was being put too far forward, causing all the guitars being manufactured to play out of tune.  When the distance was measured, it became clear what had happened.   I'm not saying that this has happened here, but these things can, and do, happen.


Anyway, I'm pleased to report  that I have a small pile of 'spare' plane blades waiting for the known good unit to turn up, and the rest of my sharpening workload is over.  I'm still disappointed that I didn't manage to get them all completed before the start of term, but at least they're all sharp now.  I've had a very positive comment from one of the teaching staff about the 'luxury' of sharp tools.  It's the plane blades that seem to have made the biggest impression.
#7
As Ken S suggested,  a copy/paste/update of my post regarding the SE-76 in the reverse configuration. 

As I've been working through my pile of blades,  ( currently I still have a pile of roughly 60 blades to go...)  using the machine in my reverse configuration,   it has struck me that a revised version of the SE-76 specifically for this configuration would be a definite improvement.
 
By reverse configuration I mean  rotating the SE-76 180degrees and mounting the blade to the new 'left' side of the jig.   (I hesitate to use the words 'upside down' to avoid confusion of turning the jig or the tool over... )
 
My reasoning is from mounting a chisel in towards the far side of the jig - as far as possible from the registration edge,  I realised that in this position the chisel was midway between the mounting holes for fitting to the USB.  To my mind this eliminates, or reduces the likelyhood of inducing a turning moment or cantilever effect on the jig.

Further, as the blade is lower down and almost horizontal, I find it more comfortable, and the third benefit is that I can accurately see where the grinding is taking place and adjust my grinding pressure focus.   

If only there was a registration edge on the other side of the jig as well...  (hint hint!)   

However to get round this using a square to set the blade in the SE-76 every time does reduce the number of skews I am getting -  occasionally the blade does move in the jig.  (addendum here: ) Also the back edge of the jig isn't completely flat so sometimes I think a chisel  blade is square when it isn't. Another discovery on some blades is that the two sides of some plane blades aren't parallel so a square blade on one side isn't square against the other, but I digress.


I think I prefer this configuration, at least at the moment.   With the back of the blade almost horizontal I can see the burr appearing as a fine silver line against the stone and with this visual aid I find i very easy to control the grind.   Since I'm usally doing a run of the same type of blade, some of the chisels are a lot shorter due to a long and much abused life and it is a lot quicker to reach for the SVS-32 and switch to that for one blade without having to re-configure the machine.  I find peering over the machine a bit uncomfortable as well. 

I'd be interested to know if anyone else has tried sharpening chisels and plane blades in this configuration and what their results are, compared to the 'normal' method.
#8
Quote from: Rob on August 15, 2014, 02:39:48 PM
They'll never make it into the kit. Cost too much.

if they ditched the gimmicky band-aids...  ;)
#9
Just wanted to add that I'm not finding much performance difference between the two configurations.  If anything the less aggressive cut is more suitable for the blades that I'm working on, purely because my view is that less aggressive = more controllable grind. or perhaps more correctable early on in the grinding process.

Certainly the burr on the horizontal grind is finer, but I can transform a bevel from the 'curve edged, multi beveled mess' to a nice straight single bevel in a couple of minutes for most blades.   

The plane blades I've been working on have a big curve in them, and it is also assymmetrical and slightly s-shaped to the point that I've managed to get a straight enough new bevel that still has one lopsided corner at the back of the bevel.   I could eliminate it but it would involve taking another couple of mm off the entire blade, which obviously is too time consuming.

I've yet to perfect the technique to give me a blade straight enough that I'd be 100% confident to use it in a No 7 Plane  for joining a pair of spruce wedges for a carved-top instrument using a rub joint, but I'm getting closer.  At the moment speed is the essence. 

I'm certainly finding that the SVS-32 has been useful for a number of chisels which are getting a bit stubby for the SE-76.   To my mind it probably should be part of the standard kit.  Actually on that thought, I think the standard kit should also include a complimentary 2" engineer's square and a Sharpie;  They're an essential part of the learning curve and the whole sharpening process in my view.
#10
As I've been working through the pile of blades,  ( currently I still have a pile of roughly 60 blades to go...)  using the machine in my reverse configuration,  it has struck me that a revised version of the SE-76 specifically for this configuration would be a definite improvement. 
My reasoning is from mounting the chisel in towards the far side of the jig - as far as possible from the registration edge,  I realised that in this position the chisel was midway between the mounting holes for fitting to the USB.  To my mind this eliminates, or reduces the likelyhood of inducing a turning moment or cantilever effect on the jig.
Further, as the blade is lower down and almost horizontal, I find it more comfortable, and the third benefit is that I can accurately see where the grinding is taking place and adjust my grinding pressure focus.   If only there was a registration edge on the other side of the jig as well...  (hint hint!)   However using a square to set the blade in the SE-76 every time does reduce the number of skews I am getting -  occasionally the blade does move in the jig.  I think I prefer this configuration, at least at the moment.  I find peering over the machine a bit uncomfortable as well.

I'd be interested to know if anyone else has tried sharpening in this configuration and what their results are, compared to the normal method.


#11
Tried a new approach with one of the 2" plane blades today.  I drew a line on the back of the blade with my square and ground off the curved end using a bench grinder, before re-establishing the bevel on the T-7.  Just to try it.  I can't say if it was any faster but it saves a bit of constant checking  with a square.
#12
Hi.  A progress report so far.

I spoke with the UK Distributor last week who asked that I send a video clip of how I use the machine, which I've done.  Perhaps I went a bit overkill with setting up my Canon DSLR on a tripod with an external Sony Mic, but there you go...   ;)


Anyway I'm currently waiting for a tested 'known good' unit to arrive from the UK distributor for me to try, which should arrive sometime next week.


But there's no real progress other than that;  the only way I can get a square blade is still to run back to front with the tool mounted in the SE-76 backwards at the front of the machine.

Running forwards I can sometimes get a curved blade because I'm fighting the inherent tendency to skew.

I'm sure that eventually we will get to the root of the issue.

The annoying thing is, I'm pleased with how quickly I can get a razor sharp edge, even with the state of some of the blades I've been sharpening.  Even a 1" chisel that had a 'bite' out of the edge in the middle.  I could have used that one to steady a nail for hammering, but it was done in around five minutes.

Running backwards I've noticed that there's a lot of fine strands of metal remain attached to bevel that don't come off until I hone the blades, but it doesn't seem to be much of an issue.  It's like a comb, but the metal is very fine and soft.

Truth be told I don't even bother polishing the whole bevel;  I can freehand hone a microbevel straight off the stone without regrading.   I suppose that's one advantage of doing a lot of blades in succession. 

I was very pleased with the sound I got from the Smoothing Plane (No 4) when I passed it over some Maple yesterday;  that gentle "sffffffffffft" that accompanies a nice thin (2 thou) shaving!   (Given the thickness of the blades being half that of the clifton blades I can't ask better than that on maple...)   
#13
I've made contact with the UK distributor as well and sent him a video of me  sharpening a blade in the vertical 'normal' position. 
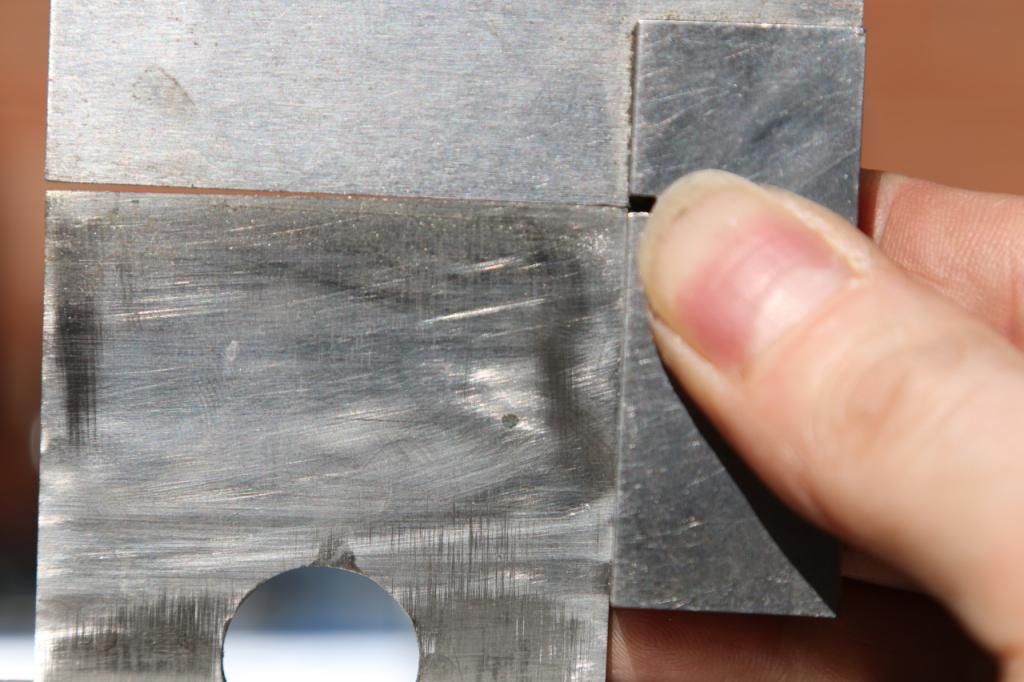
I'll share this picture with you guys as well.  this is a  shot of the blade against a square


I went back to horizontal and managed to correct the skew quite easily.


#14
just thought I'd add this, to show what I mean


#15
I think I'm getting closer to solving the issue.

I've used a couple of cable ties (zip ties ?)  on my TT-50 and have finally got a true wheel.   it was oval as well, which probably didnt help matters. 

After truing I'm still getting the same grinding pattern that I've been getting on the last 100 or so chisels.
To Rule out 100 identically wonky chisels I decided to attempt one that definitely had not been anywhere near the Viceroy so I dug out one of my Dad's old Stanley 5001 chisels, that I've used for guitarmaking. 
When I tried to sharpen it, I got the same skew appearing. so it's definitely not the legacy of the viceroy machine, or the chisels.

A square against the side of the wheel shows a tapered gap when the USB is resting against the wheel, which I think is the culprit.
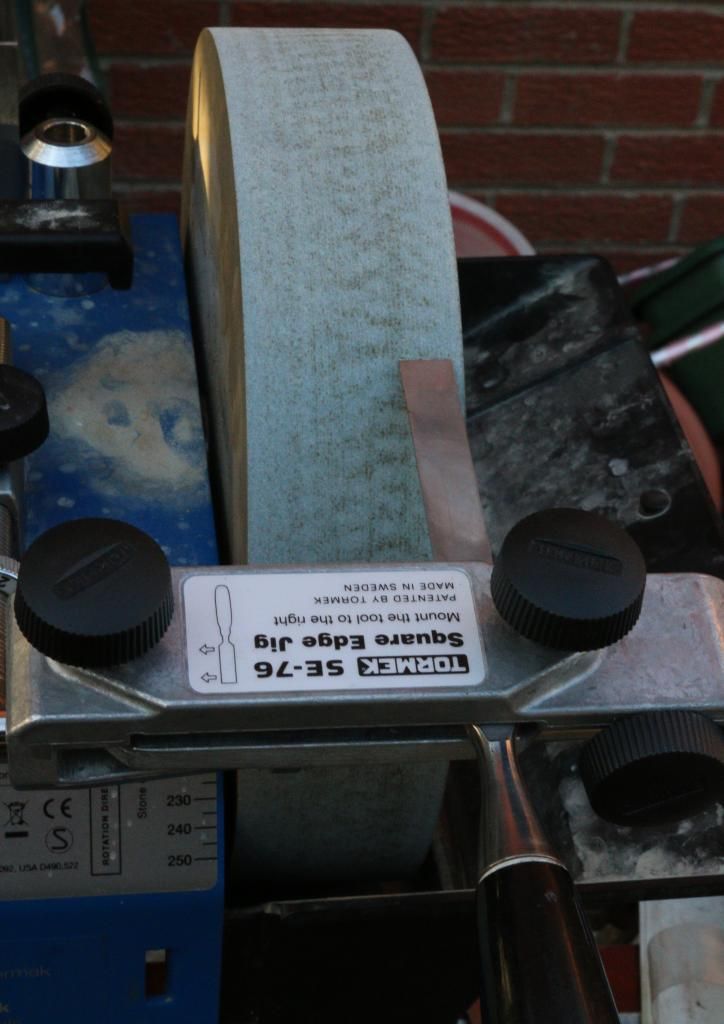
To test my theory I started running everything in reverse.  So I took the USB and mounted it on the front of the machine like you would for the SVS-32.  Then I took the SE-76 and mounted the chisel upside down at the wrong end of the jig - completely away from the registration edge.  I ensured it was square, and got to work.

Bingo, straight edge.

So I tried it again with the second SE-76 that Stig had sent to me using a school chisel.  it's also straight, after a bit of mucking around- it wasn't entirely square in the jig first time.  So I tried another, my 5001 1/2".  That is also square.
I'm about to try another School 1/2".

However I now suspect that my vertical mounting sleeves are not parallel to the wheel, which would explain pretty much everything.  the curved blades as a result of fighting the skew.

Thoughts?