News:

Welcome to the Tormek Community. If you previously registered for the discussion board but had not made any posts, your membership may have been purged. Secure your membership in this community by joining in the conversations.
www.tormek.com

Main Menu
Menu

Show posts

This section allows you to view all posts made by this member. Note that you can only see posts made in areas you currently have access to.

Show posts Menu

Topics - RobinW

#1
General Tormek Questions / Dear Santa - 2017
December 02, 2017, 11:11:35 PM
Dear Santa

Yes it's that time again when I put up my wish for the latest  - yet to be released - Tormek offering.

This year I would like to receive a T-8½R (as illustrated  in the strictly unofficial diagram below.)

The T-8½R appears to answer many issues I have with the current model.

It has been upgraded to operate with two wheels (one can select say SG250 with an SJ250 or other combination to suit one's needs). Needless to say the bushes and shaft have been changed to suit this arrangement and the additional loads.

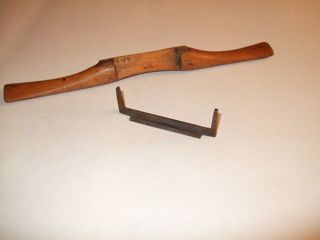
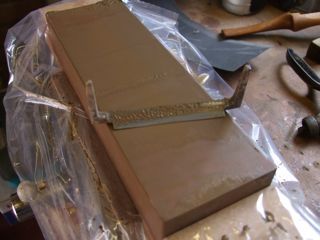
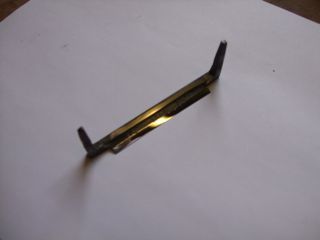
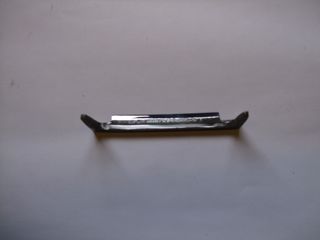
In conjunction with the double ended Universal Support Bar, it means that if both wheels have been trued to the same diameter, one can, without changing any setting, move the jig and tool being sharpened, from a stone at one grade to a stone at another eg one set for grinding and one for polishing.

The additional 'R' feature is the ability, at the flick of a switch, to reverse the motor direction, so one can change from grinding towards the edge to away from the edge - again without having to change the USB or other setting.

I would certainly appreciate finding one in my Christmas stocking.

Many thanks in anticipation.


#2
General Tormek Questions / Dear Santa 2016
December 11, 2016, 03:17:21 PM
Dear Santa

As I did not receive the Tormek FANTASY last year (I understand that Tormek withdrew the product as the nano-bots could not be properly trained), may I request one of the new Tormek T8 -3UltraWide machines allegedly under development?

This super looking machine, as shown in the pictures below, has the capability of mounting up to three wheels simultaneously (any combination of SB; SG and SJ), with separate water troughs to prevent cross contamination. With the longer USB it allows a tool to be rapidly sharpened on any of the desired wheels.

The other facility offered is an ultra wide wheel, approximately 3 times the width of a standard wheel. This would be a great benefit to those who sharpen very wide plane blades or scrapers; long knives or cleavers. It comes with a specific wide trough.

Needless to say the bushes have been beefed up to counteract the increased shaft loadings, and the various troughs have integral feet to prevent overbalance.

I look forward with great anticipation to testing this new machine.
#3
Hand Tool Woodworking / Underhand Sharpening
October 30, 2016, 01:45:58 PM
A couple of problems I have experienced are grinding at large angles. I'm OK for chisels and blades at 25º and 30º. However for unusual items requiring a long protrusion or higher angles I'm not comfortable with as I have had a couple of snatches which don't do the wheel, the tool or my nerves any good. So preferred method for higher angles is to sharpen away from the edge.

However when using the USB in the horizontal position, the square edge jig SE-76 does not allow full width sweeping of a wide the tool across the wheel due to the offset of the SE-76 and also the position of the fixings for the USB. (See the photograph in Spokeshave Challenge post number 51 of 25 October as an example.)

So last night, with a bit of lateral thinking (also known as insomnia), I thought about 'Underhand Sharpening'. I don't recollect seeing this in the manual or any videos.

I have a Veritas scraper plane to sharpen. It's 73mm wide, and the parallel sides are limited ie getting it set up for 50 mm protrusion in the SE-76 is a pain. It also requires its edge to be sharpened at 45º. I have previously tried making a jig for this with some limited success.

So last night's spark was to mount the blade facing out the back of the SE-76, still using the reference edge of the SE-76, and with the USB in the vertical position, have the blade pointing downwards so that you are sharpening away from the edge. Set up with the angle master as usual.

I have just tried it and am very pleased with my Underhand Sharpening.

A couple of things to note. I don't usually use the end stop knob on the USB as I'm familiar with the tool placement on the wheel. As this was a new position I did need the end stop knob.

When moving the blade towards the inside of the Tormek, the blade fouled on the fixing knob which locks the USB. So I swopped the knobs round ie large knob as the end stop, and small knob (now clear of the blade) to lock the USB.

Figs 1 and 2 show this in action.
#4
I'm having a blank when I try and reply to a message or create a new one. Could I have some assistance please?

I log in; go to messages, can find the 'inbox', and see an incoming message. I click on the 'Reply' button and a blank form opens up.

What do I put in the "To' box? The addressee's Forum name or something else?

I fill in the text box, I press the 'send message' button, but there is nothing in my sent box folder. So where and I going wrong?

Answers on a postcard please.
#5
General Tormek Questions / Grooving
August 26, 2016, 03:02:24 PM
I don't do much wood turning, but whenever I sharpen up some gouges I make a hash of my SG250 wheel, the latest effort is shown below. I try not to apply much load to the tools, but still end up with an undesirable surface, and subsequent loss of material by the time I have used the diamond truing tool. Most sharpening is straight tools - plane blades and chisels - and I haven't grooved the surface when doing those, even with narrow chisels. Suggestions welcome.


#6
General Tormek Questions / Dear Santa
December 20, 2015, 12:14:50 AM
Dear Santa

I would be thrilled to receive one of the new Tormek FANTASY machines

I understand this machine will be on the market before Christmas. Unfortunately I am having problems finding within the advertising literature for which Christmas it will be available.

In case you do not have a specification sheet to hand, may I take the liberty of listing the specification, below so you can identify the correct model:-

Tormek FANTASY – Futuristic Automated Nano-Technology And Sub-atomic Yearning

This amazing machine is the result of an evening's design consideration, suitably aided by the odd glass or two of aqua vitae – particularly the kind with some peat influence. The machine's design accommodates automatic solutions to all of the problems raised on the Tormek Forum. In fact so good is this new machine, it is in danger of making the Forum obsolete.

Buy using a combination of nano technology to grind the tools to the desired profile, and subsequent sub-atomic polishing of the cutting edge, never before levels of sharpness, accuracy and repeatability can be achieved. In fact Tormek cannot specify the degrees of sharpness, linearity, square accuracy; or any other metric, as they are too fine for measurement without an electron microscope.

The machine comprises two units – the central body and a series of sharpening modules which interlock on to the central body. The various sharpening modules cover flat blades (chisels and plane blades); curved blades (carving chisels and turning gouges); scissors; knives (kitchen or outdoor).

Each sharpening module incorporates a self sealing slot, into which the blade or tool to be sharpened in inserted and automatically locked.

On the central body, there is the single green button. After inserting the tool into the self sealing slot, the tool is automatically locked and assessed for 30 seconds by the Tormek FANTASY to determine previous sharpening profiles, the amount of wear or damage, and computes the best profile to be ground. If it cannot determine any suitable parameters from the tool's current status, it will resolve the matter and grind a profile which the machine self determines. When the green button illuminates, indicating that the assessment process is complete, press and hold down the green button for one second. The Tormek FANTASY will then, and here's the really clever part, sharpen that blade without any further input from the owner. After 30 seconds of nano-technology grinding and sub-atomic polishing, the green pushbutton lamp will be extinguished, and the tool unlocked allowing it to be withdrawn and ready for immediate use.

Scissors do not need to be opened – the machine automatically determines the location of the two edges to be sharpened and will undertake the necessary grinding and polishing whilst the scissors remain closed.

There is no problem concerning the squareness of straight blades like chisels or plane blades. If the machine determines any inaccuracy along either side of the blade, it will resolve any inaccuracy, so that perfectly rectangular blades will result. It will also resolve any twist along the blade.

To complete this groundbreaking machine's presence, it will retail at 400 for the central body and 150 for each type of sharpening module. (The currency strangely has not been specified.)

So advanced is this flight of fantasy machine, it's unlikely to to be matched by any competitor.

Looking forward in anticipation.

#7
Under the post 'Spokeshave Challenge' I came up with an additional plate for the SVM45 so that it could hold small spokeshave blades and also use the SE76 so that better control and square alignment can be achieved.

However when I still had another two problems. Another spokeshave blade would not fit into the SVM45 (or my modified version) due to the small lugs between the faces of the jig. Another blade I have a problem sharpening is one from a Veritas Scraper plane. This blade is 73mm (2 7/8") wide and 100mm (4")  from front to back. It has a tapered shape at the back end. It has to sharpened at 45 degree. Whilst this can be achieved by clamping it in the SE76, it does not use the registration face of the SE76 due to the shape, and has to extend well out in order to make the 45 degree bevel..

So tonight's effort is shown below where I have the basis of a jig which will cope with a wide range of blades and fits into the SE76. I have made this from acrylic sheet (which is pretty strong as the company I got it from uses it as protection over stained glass windows).

I have a top and bottom plate as shown in the first photo which also shows both the blades (so will cover a wide range in between).


I have used a line of screws and nuts down each side to that the plates will not cockle and pressure can be applied over the depth of the blade.

The following photo shows the spokeshave blade set up for 25 degree bevel and grinding towards the edge.


The next two photos show the scraper plane blade set for 45 degree bevel and grinding away from the edge.


Countersunk screws were used and as the screw heads do not protrude below the bottom face of the plate this could be used with Herman's HK50 or the Tormek SVD110. The red line was applied so that I could eyeball the blade alignment.

It was too late to try it in anger, that's the weekend's job. I think it is strong enough to use without flexing being an issue. It would benefit from a grid or some blade alignment marks so that registration with the jig edge and subsequently into the SE76 all correspond. Using the marker pen method on the bevel would soon show up the alignment. The scraper plane blade is a big thing, so if you had smaller blades then you would make your jig somewhat smaller than this one. However I can cover all sizes now and my fingers will appreciate that!


#8
This week my father gave me an old wooden spokeshave which he has had since pre 1953, and its previous owner was a retired cabinet maker. The spokeshave is therefore well over 60 years old.

The following photos show the before, during and after, as I resharpened it. I started off using a Japanese waterstone, and as there was a fair bow in the blade, it was taking its toll on my finger joints, so I tried the Tormek - freehand - a process I'm not that comfortable doing.

Flattened the back using the side if the wheel (something I would prefer not to do), inside face of blade across the wheel holding on by the tangs; then finished both using the honing wheel.

None of the jigs I have are suitable for holding this blade due to the very narrow depth of the blade and also the sharpening of both faces use full depth, so it can only be held by the tangs.

The whole process was a bit precarious due to the very narrow depth of the blade, difficult to hold steady, and I knew I was achieving the desired standard by the blood running round the stone! (The ends of my fingers were getting rubbed by the stone.)

I've re-assembled the tool and it makes a really good cut.

So here's the challenge, has anyone else else sharpened this type of blade on a Tormek and what jig did they use (if any)?


#9
Hand Tool Woodworking / Spokeshave Challenge
April 07, 2013, 07:06:38 PM
I have never mastered the spokeshave, and as I am currently making a child's rocking chair with various curved lines, I am now determined to get on top of this tool.

Staying with one model in particular, a Stanley No63 (of many years vintage) which has a curved base. I could not get it to give a decent cut on any hardwood. So to get up the learning curve, I picked a nice piece of mahogany, 22mm, wide as the grain is very uniform.

I thought the mouth too wide which was causing a lot of chatter and rough cutting. So I put a plastic shim behind the blade and this helped a lot. However the cuts were not uniform across the wood, and this was due to the blade not being parallel to the top of the mouth.  I realised that although the top and bottom edges of the mouth appeared parallel, the face on which the blade fits (like the frog in a plane) is not parallel to the top of the mouth, causing the blade to sit squint to the top of the mouth. This is an original casting issue.

I then used a piece of thick paper behind one side of the shim and this made the blade sit parallel to the top of the mouth, and I was then getting some nice full width shavings from the mahogany.

So I am now left with how to sharpen the blade. I have previously done it on Japanese wet stones but this is a pain due to the small side of the blade, and so I am looking for advice on how to sharpen the blade on my Tormek.

The blade is 13/4" (45mm) wide 13/8" (35mm) from to back, and 1/16" (~2mm) thick, so the SE76 won't look at it.

I haven't tried it yet, but I doubt the SVD 110 is the answer as the small blade means it would be finger pressure down on to the SVD110 as the only means of holding the blade, and I doubt if this would give accuracy across the blade.

Also what angle to grind? At the moment it is 25 degrees, but if I increase this to 30 degrees this may also reduce the chatter.

So suggestions welcome.


#10
Somewhere recently I noticed a comment, possibly by Herman, that he had only used 2 tubes of honing compound over several years or so. (I think I have that right - apologies if incorrect.) I've used that in just over a year, and I'm a low user of the machine.

I find that I have to apply honing compound every time I use the machine, and keep topping it up if I am honing a few chisels. I did use some oil when the machine was new as per the instructions, but I feel that the honing wheel is very firm or dried out. It does say in the book of words that oil can be added, but I haven't tried that yet.

How do you find your wheels? Is there any give in the feel of the leather? Should there be any give in the leather? How often do you apply compound? Anyone added any more oil?


#11
Hand Tool Woodworking / Hand Saw Sharpening
September 05, 2012, 01:06:05 AM
A tool which needs sharpening, and common to all woodworkers, is the hand saw.

Much as I would like to, I refuse to go out and purchase some new good quality saws until I can find a supplier, or precision tool, that could re-sharpen them to factory condition. (I am not talking about panel saws with hardened points as used for joinery/carpentry work - I have some of these and they suit their intended task well, and are 'disposable' - I am talking about quality carcase/tenon/dovetail saws for cabinetmaking.)

I have tried resharpening saws myself with limited success and I got frustrated as I could not  achieve the accuracy and repeatability I desired. Also, at my age do I not want to spend a load more time trying to achieve the standard I seek - I want to pick up a saw and use it.

I have spent a lot of time trying to locate companies which could sharpen hand saws with teeth ranging from 15 to 21 teeth per inch, with rip and cross cut options. Not many around!

One manufacturer sharpened one of their own tenon saws as a 'favour', but they do not offer this as a normal service. The Saw Doctors Association put me in touch with some companies, but they could not do the number of teeth per inch required. Handsaws just don't seem to have a place in the service industry.

I did manage to get my two oldest saws resharpened and the company concerned did this using files. (These saws are pushing 100 years old but feel right when in hand and are a delight to use compared to many others I have tried. However the blades (like my body) have seen better days!)

Having spent a career in engineering where accuracy, tolerance and performance were integral to the products we designed and manufactured, plus the tooling necessary to achieve that standard, then I am all for precision machining and the standards that can be achieved.

In the USA, Lie-Nielsen do a sharpening service for the remarkably cheap price of $15 including shipping but this service is not available in the UK. Their website says their saws "...are durable, but easily sharpened with a file." Their website does not appear to give teeth profile information although there is some information about how sharpening could be done - including the words 'with practice'.

Veritas do not provide a sharpening service but their website provides very specific teeth profile information - which I appreciate. However I do not see how a Veritas saw can be maintained to this standard without some form of accurate jig and tool arrangement. If handsaws are specified with specific included, rake and bevel angles, I am assuming these are achieved with CNC or purpose made grinding machines, and hand sharpening will not replicate that process.

I have spent so much time over the years getting my chisels and plane blades up to standard. I bought a T7 to save more wear and tear on my finger joints and now I'm up the T7 learning curve I can resharpen blades and chisels quickly and accurately. I would like to get to a similar situation with saw sharpening.

Maybe Tormek could make another jig and grinding wheel that could perform this task and produce a better ground result than most people could achieve with a file. For example, a narrow wheel asymmetrically profiled for 60 degree inclusive angle, 14 degree rake, and a jig which would hold the saw at the bevel angle (for cross cut) and a tooth arrangement so that the blade could be stepped along at the desired teeth per inch.

If I had costed the time and effort I have put, this year alone, into investigating how to get my saws sharpened, it would have been cheaper buying a new saw!

Anyone care to comment about their experiences with handsaws?
#12
Hand Tool Woodworking / Square Edge Issues with SE-76
February 20, 2012, 04:45:24 PM
I have just spent the weekend with my new T7 and a bunch of chisels for sharpening and also as practice prior to trying my plane blades. I have also a spent a lot of time looking at a lot of previous entries on the Forum relating to achieving a square edge. Although I have not achieved the ease of sharpening as demonstrated by Jeff Farris, and still some way to go, I thought I would pass on some of my experiences so far!

When I observed that I was not getting a square grind, I checked out how the universal support and wheel aligned; re-trued up the wheel (even though it looked OK against the support and I would not expect to do this on a brand new item); tried to check how the chisel(s) were square or not in the jig; tried to assess if the face of the jig was square to the registering face against which the chisel abuts; couldn't come up with a simple method of checking whether the holes in the jig were at 90 degrees to the reference face in the jig or parallel to the front face of the jig; and anything else which I could check that might affect the outcome. I could write a dissertation on this lot alone!

Conclusions and queries:-

a) Having used the side of the wheel to flatten the back of the chisels (and I experienced the same issues as reported by others in the Forum) it occurred to me this practice can introduce an area of error. As per the Tormek book, flattening 25  - 30mm (1 - 1.25") from the edge of the chisel, this does not mean that the back face at the edge end of the chisel is still in the same plane as the area  nearer the handle where it is clamped in the jig. So this can introduce a 'twist' in plane of the back of the chisel between the edge and the clamp area. The amount of metal removed in flattening should be small and insignificant, but it is an area of error introduction. The only way this can be eliminated is to flatten the back of the whole chisel, and that is not possible using the side of the  wheel, and not something any of us would like to spend our lives doing by hand.

b) Trying to prove whether the front face of the chisel is parallel to the back of the chisel is another issue, especially when using firmer chisels which are tapered. We are now getting into the realms of precision measurement which would require some measuring kit and not what I want to spend my time on.

c) As most of my chisels are, like me, getting on a bit, I also checked the sides for straightness, and found these, also like me, are not ramrod straight. This is another source of misalignment when placed against the reference face in the SE-76.

d) When a chisel is in the jig against the reference face and clamped using the nearest locking knob, looking end on to the chisel in the jig it could be seen that the back of some chisels were not sitting completely flat against the jig. Small amounts of light be seen between the items. This is due to the pressure from the clamp and discrepancies in the back of the chisel causing the chisel to cockle in the jig. This becomes more of an issue depending on the length of the chisel blade available. With the minimum of 50mm chisel blade protrusion from the jig as per the manual, the clamp was now having to cope with the chisel area near the neck or handle and this is where the shape changes from flat to round. This was overcome by changing the pressure from the nearest clamp and tightening up the far away clamp, or fiddling between the two. Not exactly slip in and clamp as per demo videos.

e) The nearest I have achieved for achieving a square edge is to place the chisel in the middle of the jig and as per instructions for Japanese blades which are generally short, and fiddle around until the grind starts to look square. This now becomes an eyeball job rather than the purpose of a square jig and takes some time. I found it difficult to determine what is the reference point or face on the jig. The front face of my jig is not machined whereas the back face is. So where to use an engineer's square and check chisel alignment is unknown. Impossible to put inside the jig when occupied by a chisel. The next issue with this is how to check for squareness. As the blade protrudes from the jig by 50 - 60mm it requires a very small engineer's square with a handle section less than 50mm long - which I do not have at present - to do this task. More time has been spent trying to find a source, and in a previous Forum entry someone advised that Starrett make one. Their website shows one as 75mm (3") but this I believe refers to the blade. However I have just had a call back from Starrett that the inside length of the handle section is 37mm so this will do the trick.

So where does this leave me?
I think I will go back and check and reflatten the back of the chisels which may look out of true from the Tormek wheel and re-do them on a Waterstone for as big an area as my hands will allow. Plane blades have been previously done this way and will stay that way!

For any firmer chisels with tapered blades, or any which are not dead straight along their side, then I expect I will mount them in the centre of the jig and use a small square to check for alignment. The SE-76 jig will aid grinding as a guide but not fulfilling its intended use.

For bevel edge chisels with straight sides I will have another attempt and hopefully I can get the jig to work as the designers intended.

As for plane blades, this may be another story in the future!

Maybe Tormek could re-consider their jig design for the next generation, where the jig is extended towards the wheel and the chisel clamped close to the edge. This would allow clamping to be done in the flattened back area, and square alignment would also be achieved near the edge which would also make it more accurate by eliminating any chisel side discrepancies. Sketch thoughts can be made available!

For some years I have not been able to justify to myself the cost of a Tormek machine, but having taken the plunge I have to get it to work effectively and efficiently. It certainly can produce sharp edges as witnessed by my trial wood cuts and the sticking plasters on my fingers!

So any comments on the above experiences and how to get  up the learning curve would be appreciated.